A pie’s crust is crucial. We’ll teach you how to bake flaky pie crusts that will impress your family and friends.
The texture of a pie crust determines its taste.
These tips will help you make a light, tender, and flaky pie crust, regardless of your baking experience.
What is Pie Crust?
A pie crust is a fundamental component of a pie that forms the outer shell or casing.
It serves as the base and enclosure for various fillings, such as fruit, custard, or savory ingredients.
Pie crusts come in different forms, but the most common types are flaky and crumbly.
A flaky pie crust is characterized by its delicate layers that are light, airy, and crisp when baked.
It provides a satisfying contrast to the filling and adds texture to the overall pie experience.
Tips for making perfectly flaky pie crust
- For the flakiest crust, use well-chilled fat cut into small pieces. The fat needs to maintain its integrity in the dough for a truly flaky crust. On a hot day, freeze the fat for 10 to 15 minutes before making the dough.
- Begin with the minimum amount of liquid required in the recipe to prevent excessive gluten development, adding only enough to make the dough hold together when pinched between your fingers while ensuring the dough appears shaggy.
- Chill the dough for 30 minutes to 2 days before rolling it out, or freeze it for 10 minutes on hot days, to ensure optimal results.
- Roll out the dough on a well-floured surface using a floured rolling pin, rotating it a quarter turn after each pass to check for sticking, and adding a sprinkle of flour if needed.
- Roll the dough away from yourself, starting from the center, while maintaining even pressure with the rolling pin to ensure consistent thickness throughout the circle, aiming for thicker edges rather than a thinner center.
- Gently lower the dough into the pie plate, allowing it to naturally fall into the creases at the edge, avoiding any stretching or force, as the stretched dough tends to shrink back during baking.
- Before blind-baking or filling the pie, cover and chill the lined pie pan (including the rolled-out top crust, if applicable) to ensure the pie retains its shape and size during baking.
- For a perfectly tender and flaky pie crust, bake the pie until the crust turns a deep, rich brown color, rather than just golden.
Detail tips for perfectly flaky pie crust
Let’s dig into the details of the point we discussed above for making the perfect flaky pie crust. Let’s dive in and discover the secrets to baking a flaky pie crust.
Right Ingredients
To achieve a perfectly flaky crust, start by selecting high-quality ingredients.
Opt for all-purpose flour, which strikes a balance between protein content and tenderness.
You can also experiment with alternative flours like whole wheat or pastry flour for unique flavors and textures.
Choose unsalted butter or vegetable shortening for its ability to create a flaky texture.
Proper Measurement
Accurate measurement is vital in baking, and pie crusts are no exception.
Use measuring cups and spoons specifically designed for dry ingredients to ensure precise amounts.
Too much flour can result in a dry and tough crust, while too little can make it crumbly. Maintaining the right balance is key to achieving the perfect flaky pie crust.
Mixing Techniques
When mixing your pie crust dough, aim for a delicate balance between under-mixing and over-mixing.
Over-mixing can develop gluten, leading to a tough crust, while under-mixing may result in an uneven distribution of ingredients.
Use a light hand and mix until the dough just comes together, without overworking it.
Fats
Fats play a crucial role in creating a flaky texture.
Incorporating cold fats, such as butter or shortening, into the flour creates pockets of fat that melt during baking, producing flakiness.
Cut the cold fat into small pieces and work it into the flour using a pastry cutter or your fingertips until the mixture resembles coarse crumbs.
Chilling the Dough
After mixing the dough, it’s crucial to let it rest and chill in the refrigerator.
Chilling allows the fats to solidify again, which helps maintain the flaky texture.
Wrap the dough tightly in plastic wrap and refrigerate for at least an hour or overnight for best results.
Rolling Out the Dough
When it’s time to roll out the dough, lightly flour your work surface and rolling pin to prevent sticking.
Begin rolling from the center and work your way outward, rotating the dough occasionally to maintain an even thickness.
Avoid excessive rolling, as it can toughen the crust. Aim for a thickness of about ⅛ inch for a perfect balance of flakiness and structure.
Transferring to the Pie Pan
Once you’ve rolled out the dough, carefully transfer it to the pie pan.
Gently lift and drape the dough over the pan, avoiding stretching, which can lead to shrinkage during baking.
Press the dough into the bottom and sides of the pan, ensuring it fits snugly. Trim any excess dough, leaving a slight overhang for crimping.
Crimping the Edges
The crimped edges of a pie crust not only contribute to its aesthetics but also help seal the pie and prevent leakage during baking.
There are various crimping techniques you can try, such as using a fork, pinching the dough with your fingers, or creating decorative designs with a knife.
Choose a method that suits your preference and the style of your pie.
Pre-baking or Blind Baking
For certain pie recipes with fillings that don’t require extended baking, pre-baking, or blind baking the crust is necessary.
This involves partially or fully baking the crust before adding the filling. Pre-baking helps ensure that the crust remains crisp and flaky, even with moist fillings.
Follow the recipe instructions for the specific timing and temperature needed.
Filling and Baking the Pie
Once your crust is ready, it’s time to add the filling.
Whether it’s a classic apple pie or a savory quiche, ensure the filling complements the flaky crust.
Follow the recipe instructions for the appropriate filling and baking time, keeping in mind that different fillings may require specific adjustments.
Tips for a Golden Brown Crust
To achieve that coveted golden brown crust, brush the surface of the pie with an egg wash or milk before baking.
This will give it a beautiful shine and enhance the browning process.
Sprinkling a small amount of sugar on top can add a delightful crunch and caramelization.
Recipe for Flakey Pie
Follow these steps for making a perfect flaky pie:
Ingredients:
For a double crust (for a standard 9-inch pie):
- 2 1/2 cups all-purpose flour
- 1 cup unsalted butter, chilled and cut into small cubes
- 1 teaspoon salt
- 1 teaspoon granulated sugar
- 6-8 tablespoons ice water
Instructions:
- Ensure that both the butter and water are very cold. You can even cube the butter and place it in the freezer for about 15-20 minutes.
- In a large mixing bowl, whisk together the flour, salt, and sugar.
- Add the chilled butter cubes to the flour mixture. Use a pastry cutter or your fingers to cut the butter into the flour until the mixture resembles coarse crumbs. You want some pea-sized pieces of butter in the mixture.
- Sprinkle ice water, one tablespoon at a time, over the flour and butter mixture. Gently toss the mixture with a fork after each addition. Add just enough water until the dough begins to come together. You want it to be moist enough to stick together but not too wet.
- Divide the dough in half. Place each half on a piece of plastic wrap, and shape it into a flat disk. Wrap the disks tightly in plastic wrap and refrigerate for at least 1 hour. This chilling process helps to relax the gluten and allows the fats to solidify, which results in a flakier crust.
- Once the dough has chilled, roll it out on a floured surface. Roll from the center out, rotating the dough periodically to ensure an even thickness. Roll the dough to fit your pie dish.
- Gently fold the rolled-out dough in half and then in half again. Transfer it to the pie dish and unfold it, fitting it into the dish. Trim any excess dough hanging over the edges.
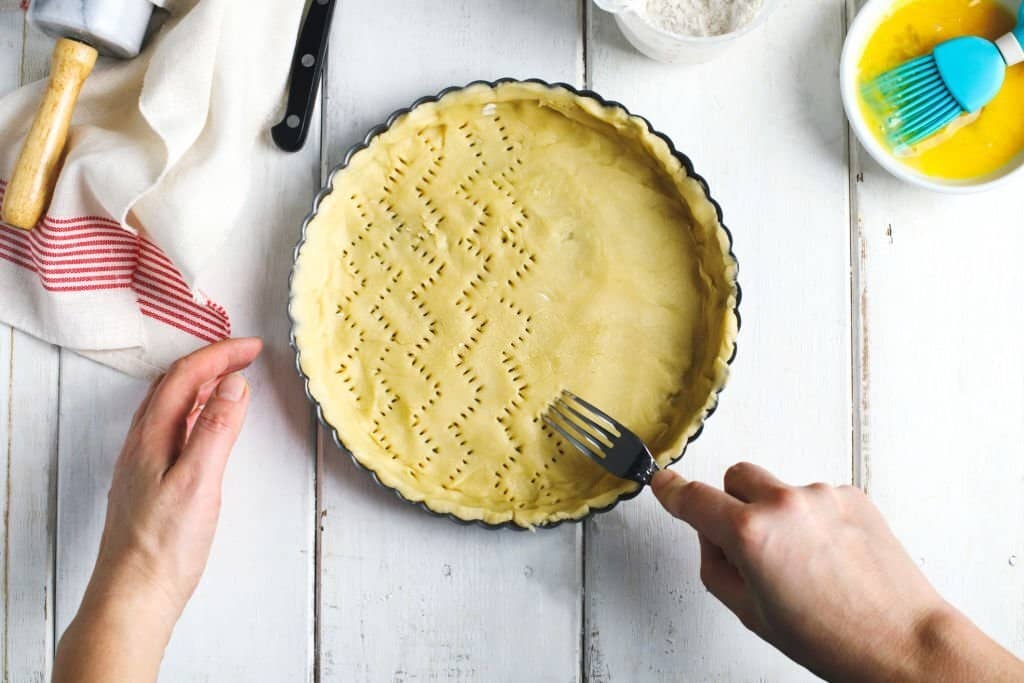
- Depending on your pie recipe, you may need to pre-bake the crust before adding the filling. If so, preheat the oven, prick the bottom of the crust with a fork, line it with parchment paper, and add pie weights (or dried beans). Bake for about 15 minutes, then remove the weights and parchment paper and bake for an additional 5-10 minutes until lightly golden.
Conclusion
Mastering the art of making a perfectly flaky pie crust takes practice, but with the right techniques and tips, you can elevate your pie game to new heights.
Remember to choose high-quality ingredients, measure accurately, handle the dough with care, and experiment with various techniques.
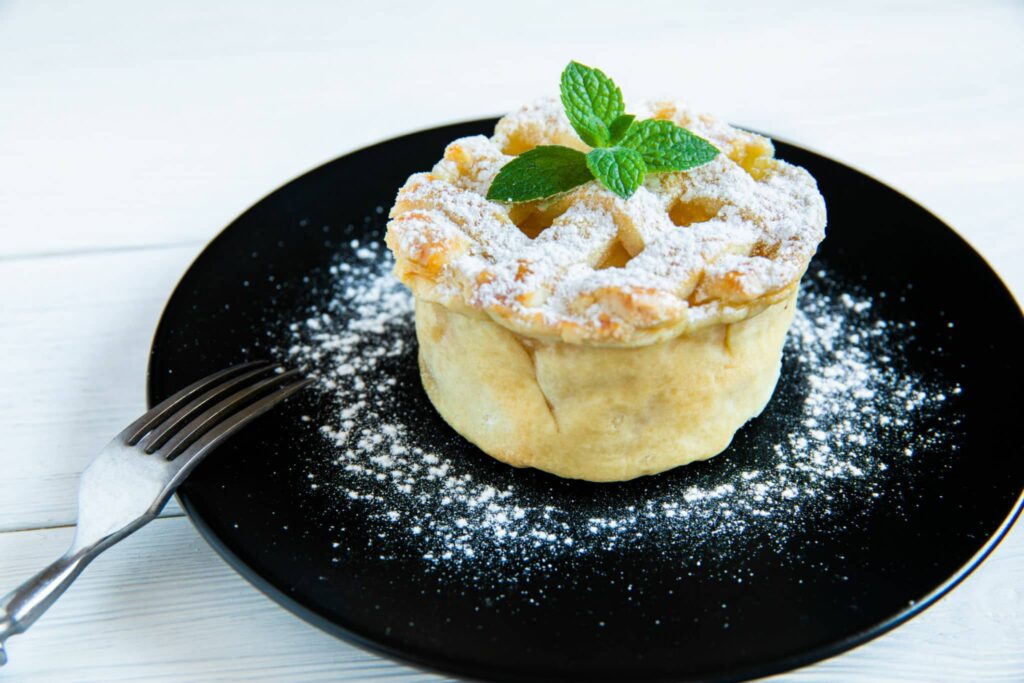
Whether you’re baking a sweet fruit pie or a savory quiche, a flaky crust will undoubtedly impress your family and friends.
Related Post: Tips For Decorating Desserts Like A Pro